Finally Build Your Dream Shed

Build your dream shed with easy access, storage galore and a private porch for lounging. Here’s how to do it:
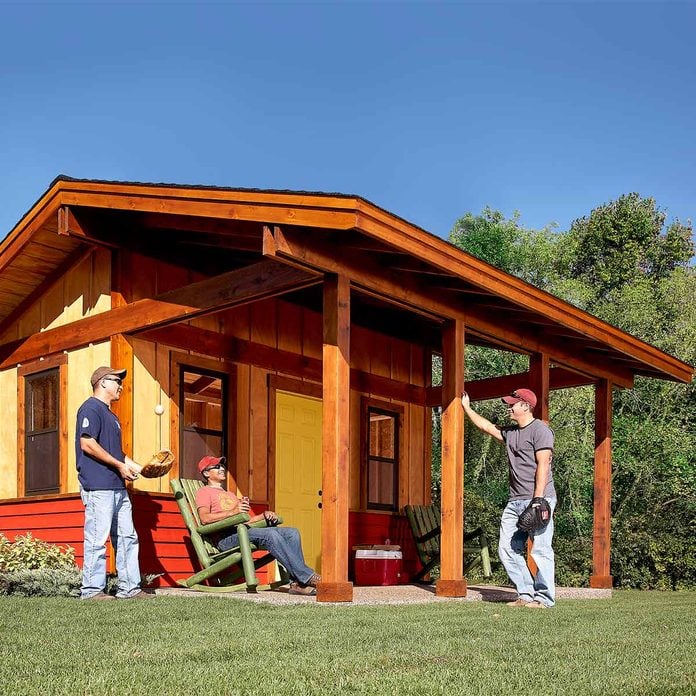
Shed Plus Shelter
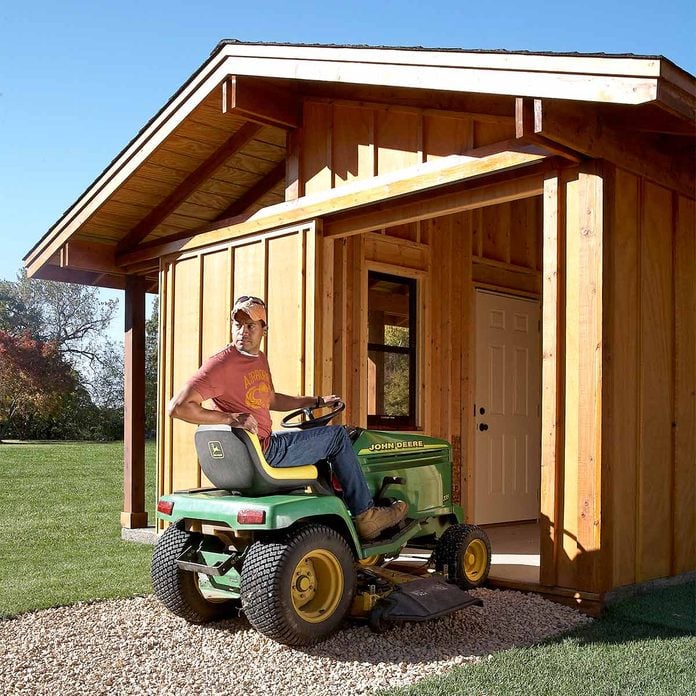
This shed has a large sliding door on one end to access the 8 x 16-ft. storage area, three windows for lots of light and a front entry door for extra convenience. But the best feature is the large covered porch where you can work on projects or just hang out in the shade with friends. The front half of the roof is supported by 6×6 posts and 2×10 beams. We continued the post-and-beam look on the rest of the shed, using the 2×10 beams to support the wide roof overhangs. We used inexpensive standard framing lumber for the beams and corner boards, and coated it with a super-durable finish to give it a rich, rustic appearance. The windows are aluminium storm windows. The front door is a steel entry door purchased at a home centre.
Find additional construction drawings here.
Click here for the full materials list for this shed.

Building Tech Art
Follow this illustration as you build the shed. Read on and we’ll walk you through each step along the way.
Construct the Walls
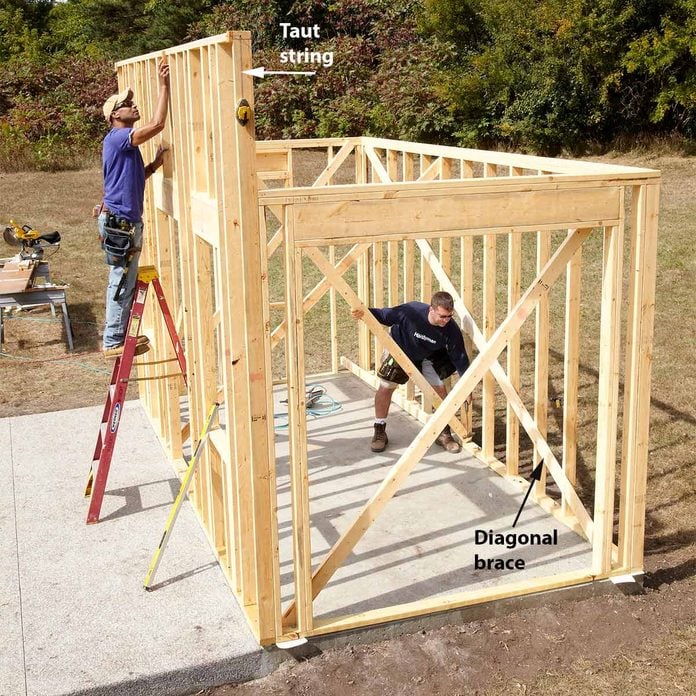
Start by measuring 3-1/2 in. from the outside edge of the slab on the back and sides and snapping chalk lines to mark the interior edge of the bottom plate. Then measure from the back line to mark the location of the front bottom plate and snap a line. Now measure between the pairs of opposite lines to make sure they’re parallel, and measure diagonally from corner to corner (where the chalk lines intersect). The diagonal measurements should be equal. If not, the slab is not square and you should cheat the lines as needed until the diagonal measurements are equal. If you skip this step, you risk fighting with an out-of-square building for the entire project. With chalk lines snapped, you can cut the 2×4 plates to length and mark the stud and window and door openings on them according to the plans. Drill holes in the treated bottom plates for the anchor bolts. Then build the walls.
Build the walls flat on the slab and then stand them up. Plumb the corners with a level and nail diagonal braces to the walls. Straighten the top plate by stretching a string over spacer blocks at each end. Gauge the straightness with a third block. When the top plate is straight, nail the brace.
Psst! Check out these easy-to-build shed kits to match your project ideas, budget and style.
Stand Front Posts and Beams
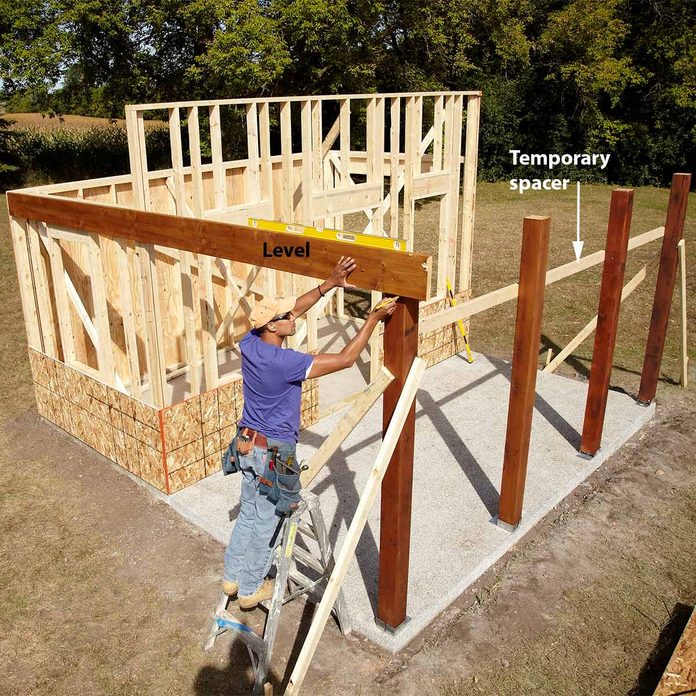
The front half of the roof is supported by four 6×6 cedar posts that are notched to accept both 2×10 beams. This photo shows how we set them up for marking the location of the notches. Rest the bottom of the posts on the metal post brackets and temporarily brace them. We used screws for all the temporary bracing because they’re easy to put in and take out. Use one of the 2×10 beams to mark the end post as shown in the photo. Do the same thing on the opposite end, and then snap a chalk line between the marks to mark the centre for notching. Number the posts so you get them back in the right spot.
Cut the Notches
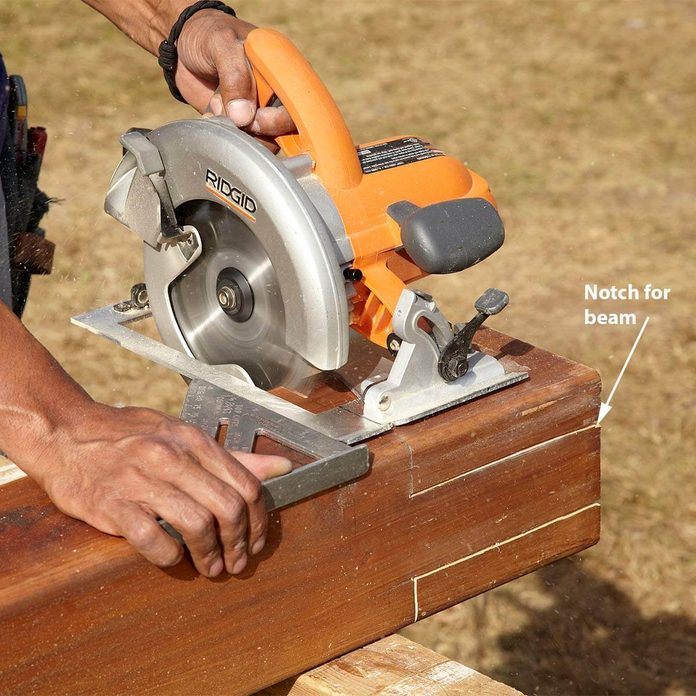
Take the posts down and cut the notches. Mark 1-1/2-in.-deep notches on both sides of the posts. Cut as much as you can with a circular saw. Complete the notches with a handsaw.
Frame the Roof
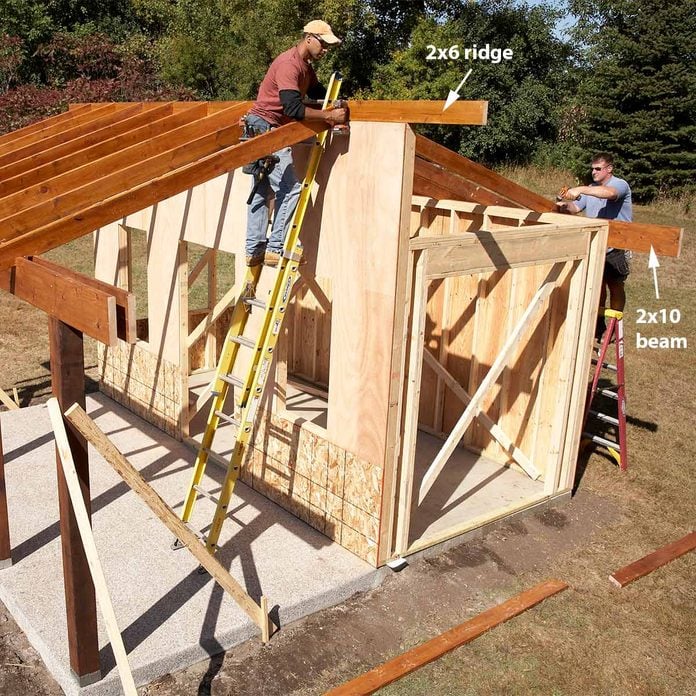
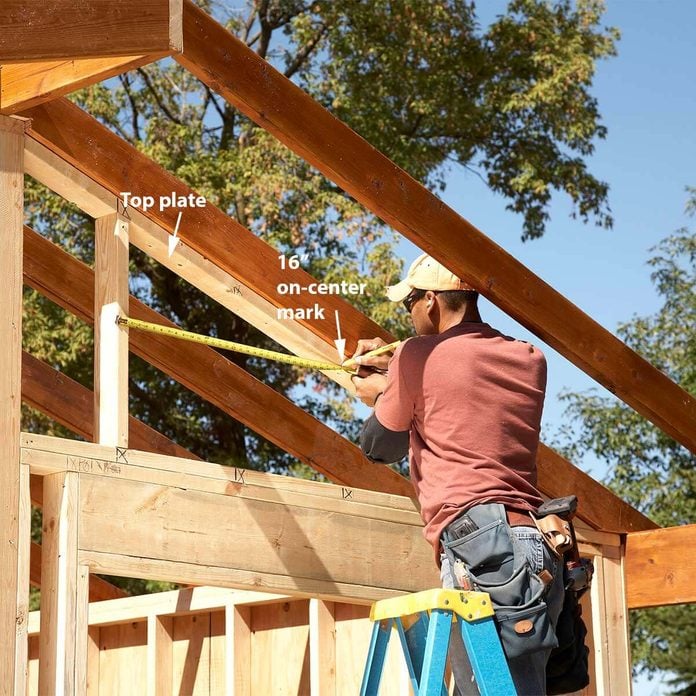
Cut the 2×6 rafters according to the dimensions. Mark the 2×6 ridge, the top plate of the back wall and the top of the front beam with the rafter locations. The rafters are 2-ft. on center. Nail or screw the ridge to the top of the front wall. Check the plans for the exact position of the ridge. Also cut and attach the 2×10 beam that runs along the top of the back wall, making sure it protrudes 2 ft. on each end. Now you’re ready to install the rafters. We used 3-in. screws to attach the rafters, but 16d framing nails will also work.
Finish the Walls and Add Plywood Siding
With the roof frame in place, you can fill in the short studs on each end wall. Start by cutting angles on the ends of the top plate and screwing or nailing it to the underside of the rafter. Then mark the location of the studs. Measure and cut the studs and nail them in. Finish the walls by nailing the cedar siding to the top of the front and side walls. You can cut the window and door openings before or after installing the plywood siding.
Complete the Beams
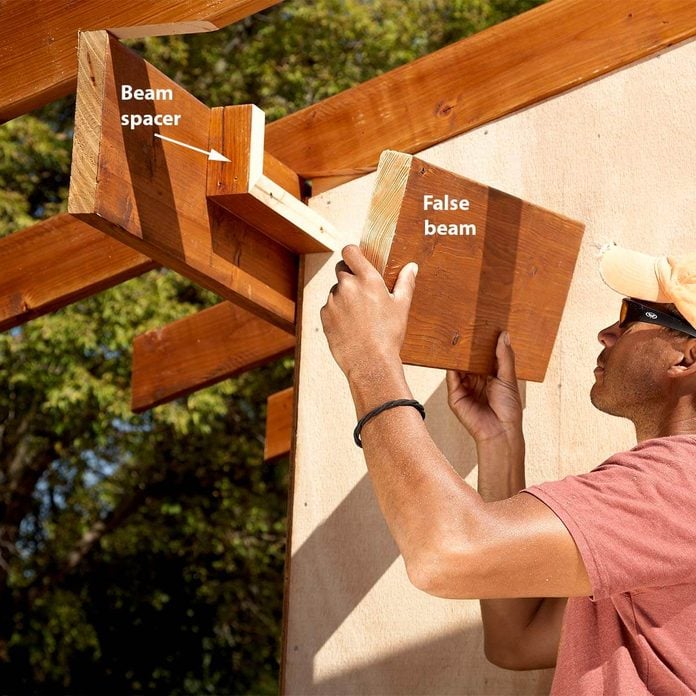
The remaining beams are decorative. One snugs to the underside of the rafters on the front wall. Two more run between the front and the back beams. After these are in place, add the 2-1/2-in. spacers and the decorative second half of all the beams. Finally cut a 2×10 to fit horizontally between the side beams, above the door and windows, and nail it to the front wall.
Sheathe the Roof
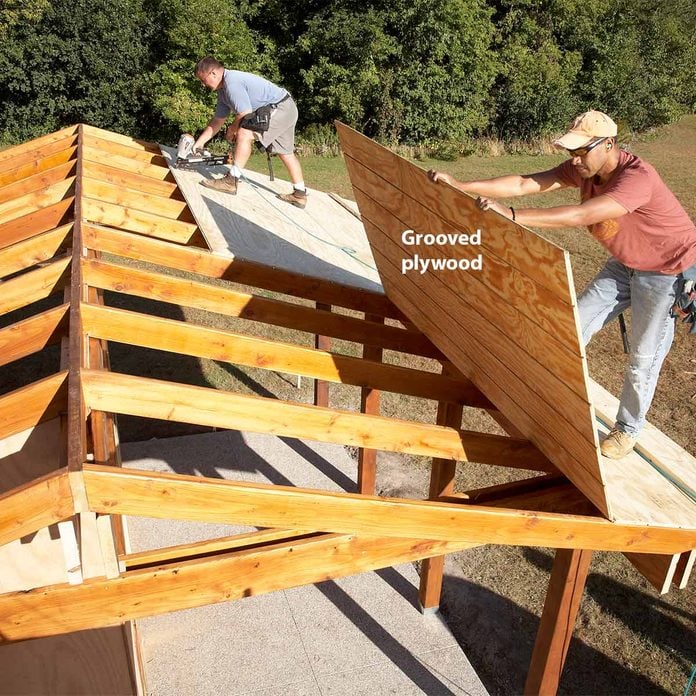
For a more finished-looking ceiling, we installed 4 x 8-ft. sheets of 8-in.-on-center grooved pine siding, face side down, over the rafters. Then we covered this with a layer of 1/2-in. OSB so the roofing nails wouldn’t poke through.
Build the Sliding Door
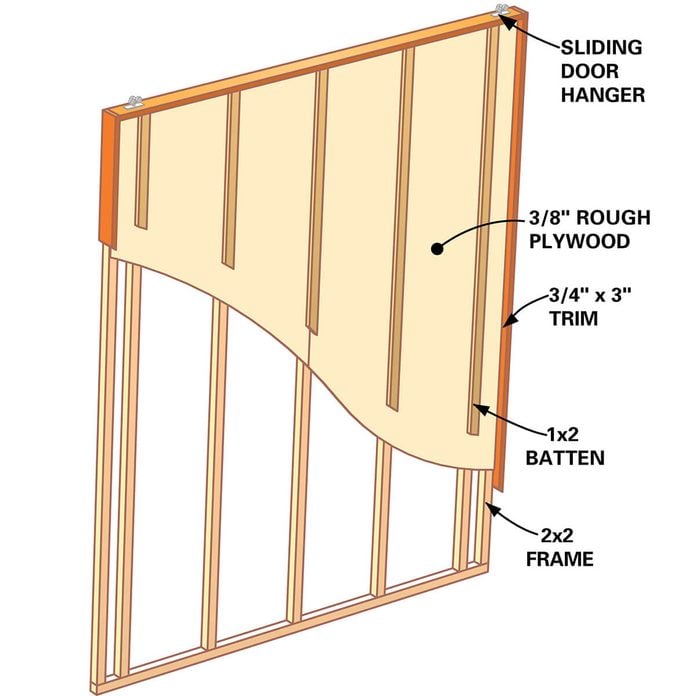
Screw 2x2s together to form the frame for the sliding door according to the plan details. Then nail 3/8-in.-thick cedar plywood to the 2x2s and wrap the perimeter with 1x4s ripped to 3 in. Nail the 1x4s flush with the back of the 2x2s so they protrude past the siding. The 1x4s will cover the ends of the battens.
Install the Sliding Door Track
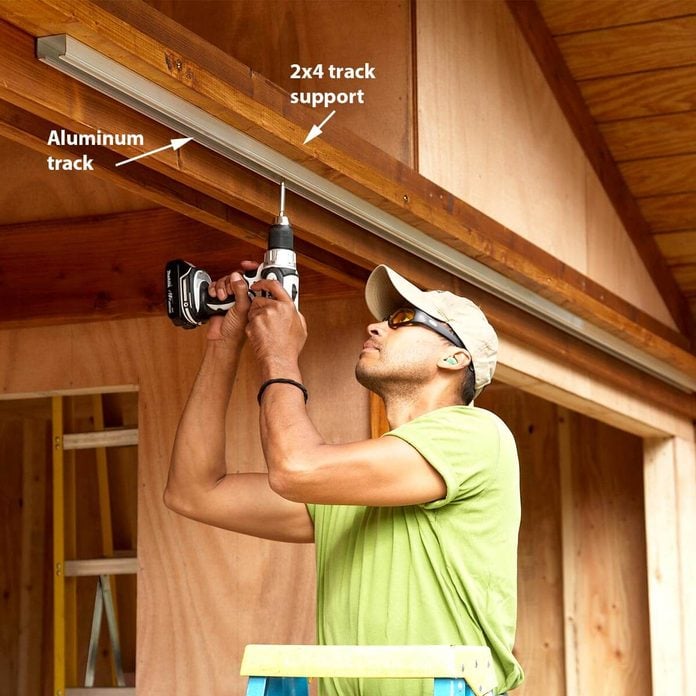
We used Johnson Hardware’s heavy-duty bypass door hardware to support the exterior sliding door. The parts are easy to order online (see the Materials List), and the three-wheel hangers operate smoothly. Attach the 2×4 track support to the 2×10 beam with 1/4-in. x 5-in. lag screws. Then screw the tracks to the underside of the 2×4, spacing them about 1/4 in. from the beam.
Mount Door Hangers
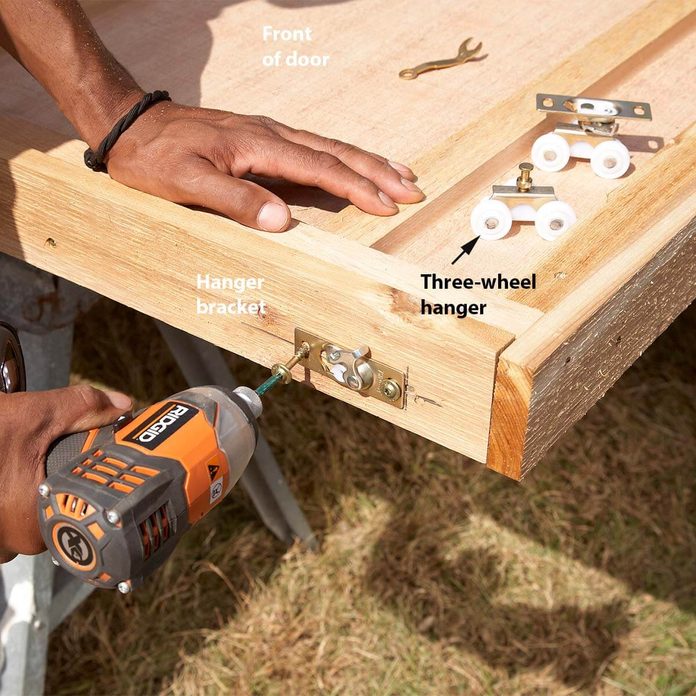
Mount the hanger brackets to the top of the door. Slide the wheel assemblies into the track and screw a block of wood into the open end of the track to prevent the door from rolling off the end. Then hang the door on the track by clipping the wheel assemblies into the hanger brackets.
Add a Sill
We bought a standard 3-ft.-wide steel entry door from a home center, removed the moulding and installed it in the front wall. Install the front door and windowsill before mounting the windows. Nail 1-in. x 4-in. trim boards to the sides of the front door and use a 2×6 for the top trim. We cut the window and door trim from 1-in.-thick cedar decking.
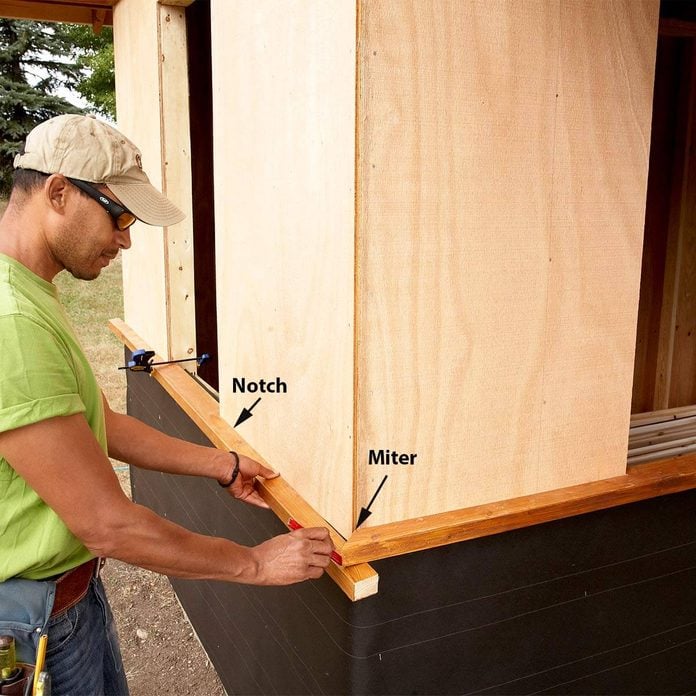
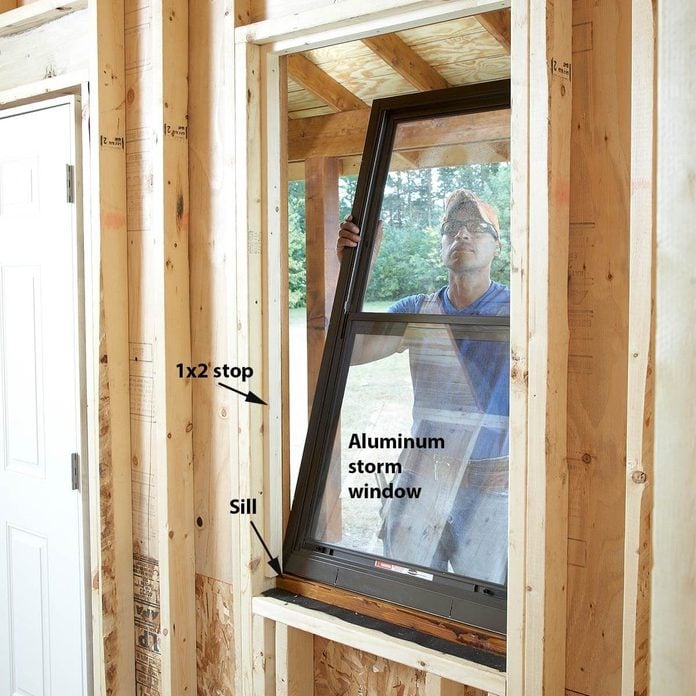
Make the angled sill piece by ripping a 10-degree bevel on the front and back edge of a 2×4. Notch the sill pieces to protrude 1 in. into the window openings. Then mark where they intersect at the outside corner and cut the mitres. Be sure to tilt the sill at a 10-degree angle in your mitre saw when you’re cutting the mitres. Do this by pressing the bevelled side tight to the fence.
Install Windows
The custom-size aluminum storm windows we used have 1-in.-thick expandable U-shaped channels around the perimeter for mounting. We nailed 1x2s to the sides and top of the framed openings, 1 in. back from the face of the siding and screwed the windows to these. If you use storm windows with thin mounting flanges, relocate these nailing strips to 1/8 in. behind the face of the siding. See the Materials List online for window-ordering details.
Trim the Roof
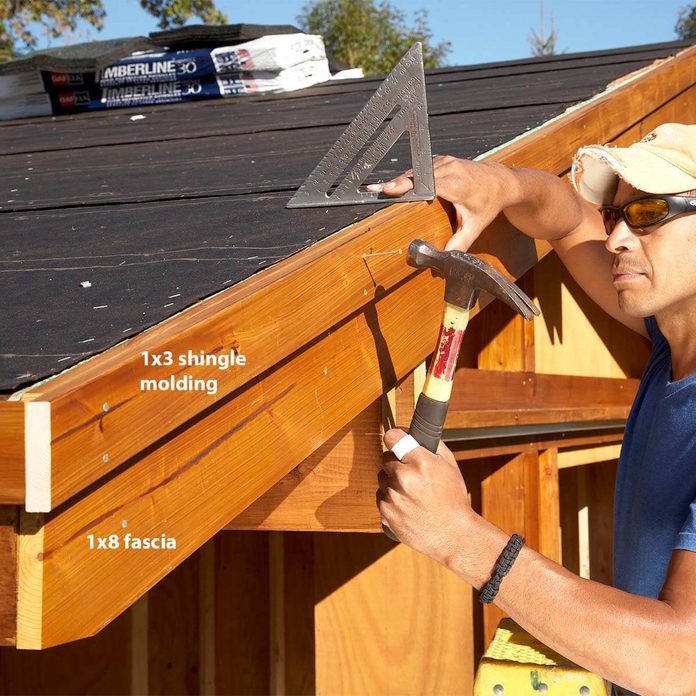
Install the 1×8 fascia boards and the 1×3 shingle molding. Make sure the 1×3 shingle molding is lined up with the roof surface.
Add Shingles
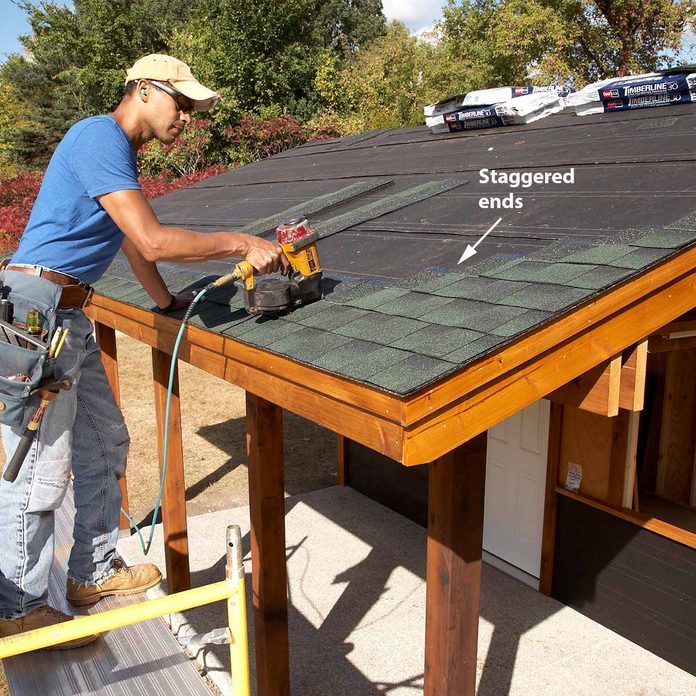
Staple roofing felt over the sheathing, overlapping the seams about 3 in. Then nail on the shingles according to the manufacturer’s instructions. Cover the ridge with ridge shingles.
Install Lap Siding
The corners of the shed are covered with 2×6 SPF lumber to look like posts. The front corners are a little tricky because the 2x6s have to be cut to fit onto the angled sill. The easiest solution is to rip the 2x6s to form a 45-degree bevel on one long edge. Then cut the 10-degree angle on the bottom (where they sit on the sill) and join the bevels to form the corner.
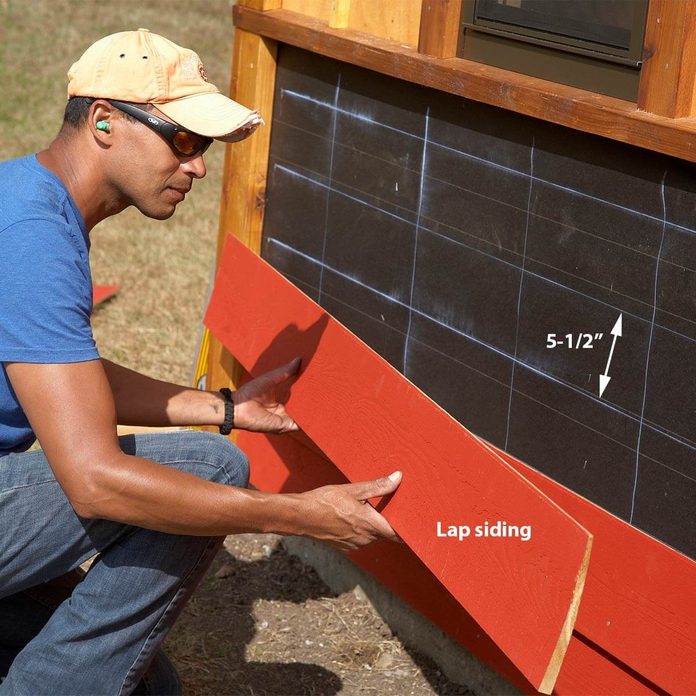
We installed 1/2-in. x 7-1/4-in. rough-cedar lap siding under the windows and finished the cedar plywood siding with 1×2 bat-tens nailed to the studs every 16 in. Cover the OSB with No. 15 building paper before you install the siding. If you use the same size siding, you’ll have six courses with 5-1/2 in. of the siding exposed on each course. Start by ripping the top piece of siding to 5-1/2 in. and using the leftover strip as a starter under the first course. Align it with the bottom edge of the bottom plate and nail it on. Then nail the first course of siding over this. Continue with the remaining pieces, overlapping them to leave 5-1/2 in. of the previous course exposed.
Finishing Touches
Touch up the paint and stain and install the door hardware and you’re ready to pull up some chairs to enjoy your new hangout.